Why this journey?

I've been retired now for over a year. Husband has been sick but is now doing quite well with new pacemaker. I continue to knit and knit and crochet. Recently I became friends again with my sewing machine so you will see some of those projects, too. Thanks for reading.
Showing posts with label circular needles. Show all posts

Wednesday, March 21, 2012

Ultimate Flexibility

Knitters have it and enjoy it -- ultimate flexibility.  We can begin a sweater at the neck, at the yoke, at the end of one sleeve (and knit 'across') or the traditional way, from the bottom up.

Top down is the appropriate adjective for this one.

This KAL is proceeding nicely.  It's the Lapis Yoke Pullover from Interweave and is the subject of their KAL.   You will have to purchase the pattern; look for an Interweave special or coupon.  Reliable patterns, always.


Start this one at the neckline with a US6 and a few rows of
knit and purl in the round, to make it look like garter stitch.
Then move to 1x1 ribbing.  After a few rows, increase to
create 1x2 ribbing.  Follow this pattern for a few rows,
increase again to 1x3 ribbing. . . etc.

The yoke expands and the 1-stitch knit in the ribbing is on display.  Here's a close-up.
For my size I ended the yoke with 1x5 ribbing.
The body of the sweater, and the sleeves are knit
in stockinette stitch.  1x1 ribbing at the end of the sleeves
and around the bottom of the sweater.
Some shaping at the waist.

This one allows me to report several items of good news -- 
  • I'm knitting up stash;  bot this Cascade 220 Superwash when they wound the skeins as part of manufacturing.
  • I'm already at the body of the sweater, which means I'm keeping pace (I think) with the KAL.
  • I'm knitting with one of my absolute favorite colors.
  • I'm knitting with size US7 needles and in the round so things are smooth and easy for knitting.

Can't get much better than that!

No, wait!  The SUN is shining in Lakewood.  Now that is something to see and celebrate and enjoy.


Saturday, January 14, 2012

The Train

I think I have discovered the mythical tunnel with the light at the end.  Yes, it's a train.

Yet another mistake on the white shawl.  Just about finished with the final pattern and ready to bind off.  I wanted to show myself that I could do just one more row.  And wouldn't you know, about half way into this final row (not counting the purl row to get back to the beginning), I discover a mistake.

Yikes.  The light IS a train and it's heading straight for me.  Several choices at this point -- too boring to describe and too traumatic to re-live -- so I decide to repeat the solution from the earlier mistake.  I decide to rip back by removing the stitches from the needle.

It's encouraging to realize I have actually learned
from my mistakes.  This time I use, not a needle and fine
crochet thread, but Hark, Batman, another needle.
It's a tiny one, a US2, and you can see it peeking out
just to the left of the (seemingly) large teal tip of the
circular needle.

So now all the stitches I want to rip back are sitting securely on the tiny US2 and all I have to do is
  1. Gently pull the yarn out and then
  2. Replace the stitches onto the larger needle.
Here's what it looks like when all the stitches are on the tiny needle and I'm ready to replace them to the larger needle.
Left to right:  Tip of larger needle US9 which I have removed
from the cord.  Next is the cord with a purple cap to prevent
the stitches from escaping.  The skinny gray needle is lying
across the other end of the circular needle.
I am ready to crochet now.  Instead of closing off the knitting by a usual method which makes a firm and finished edge, capturing all stitches one within the next, I will be crocheting some fringe as I seal off the stitches of the shawl.

Left to right again:  Knitting stitches on teal US9.  Then the
size H crochet hook inserted into a stitch, ready to chain
the fringe.  Above and to the right is the beginning
of the fringe.

The next time you hear from me this shawl will be completed and on the floor for blocking.  It's huge and I will need every bit of empty floor space available.  I'm thinking of folding into its respective thirds (remember it's 3 0f 6 sections, or half, of a hexagon) and blocking them one on top of the other.  Unorthodox, for sure.
Lacey fringe to match the delicacy of the shawl.

If I'm not able to make a go of it to the end, you'll find me riding on a train.  A kind soul will have wrapped my shoulders and head with a partially completed white shawl.  And you'll notice -- fashion folks that you are -- that the white shawl matches the long armed jacket I'm wearing.  Another kind soul will have tied the longs arms of my jacket around to the back.  There will be a light at the end but I might not see it thru the mesh of the shawl.


Tuesday, December 27, 2011

Getting to the point . . .

Got there!  Finally finished the third repeat of the first pattern set on the white lace shawl.  Definitely a milepost.  Then the pattern said to switch to a needle size one larger than the one with which I began the shawl.  I started with ad US6 so at the eyelet row -- new pattern set -- I introduced the larger needle.  On the first right side row of the eyelet pattern I began with the new and larger needle.

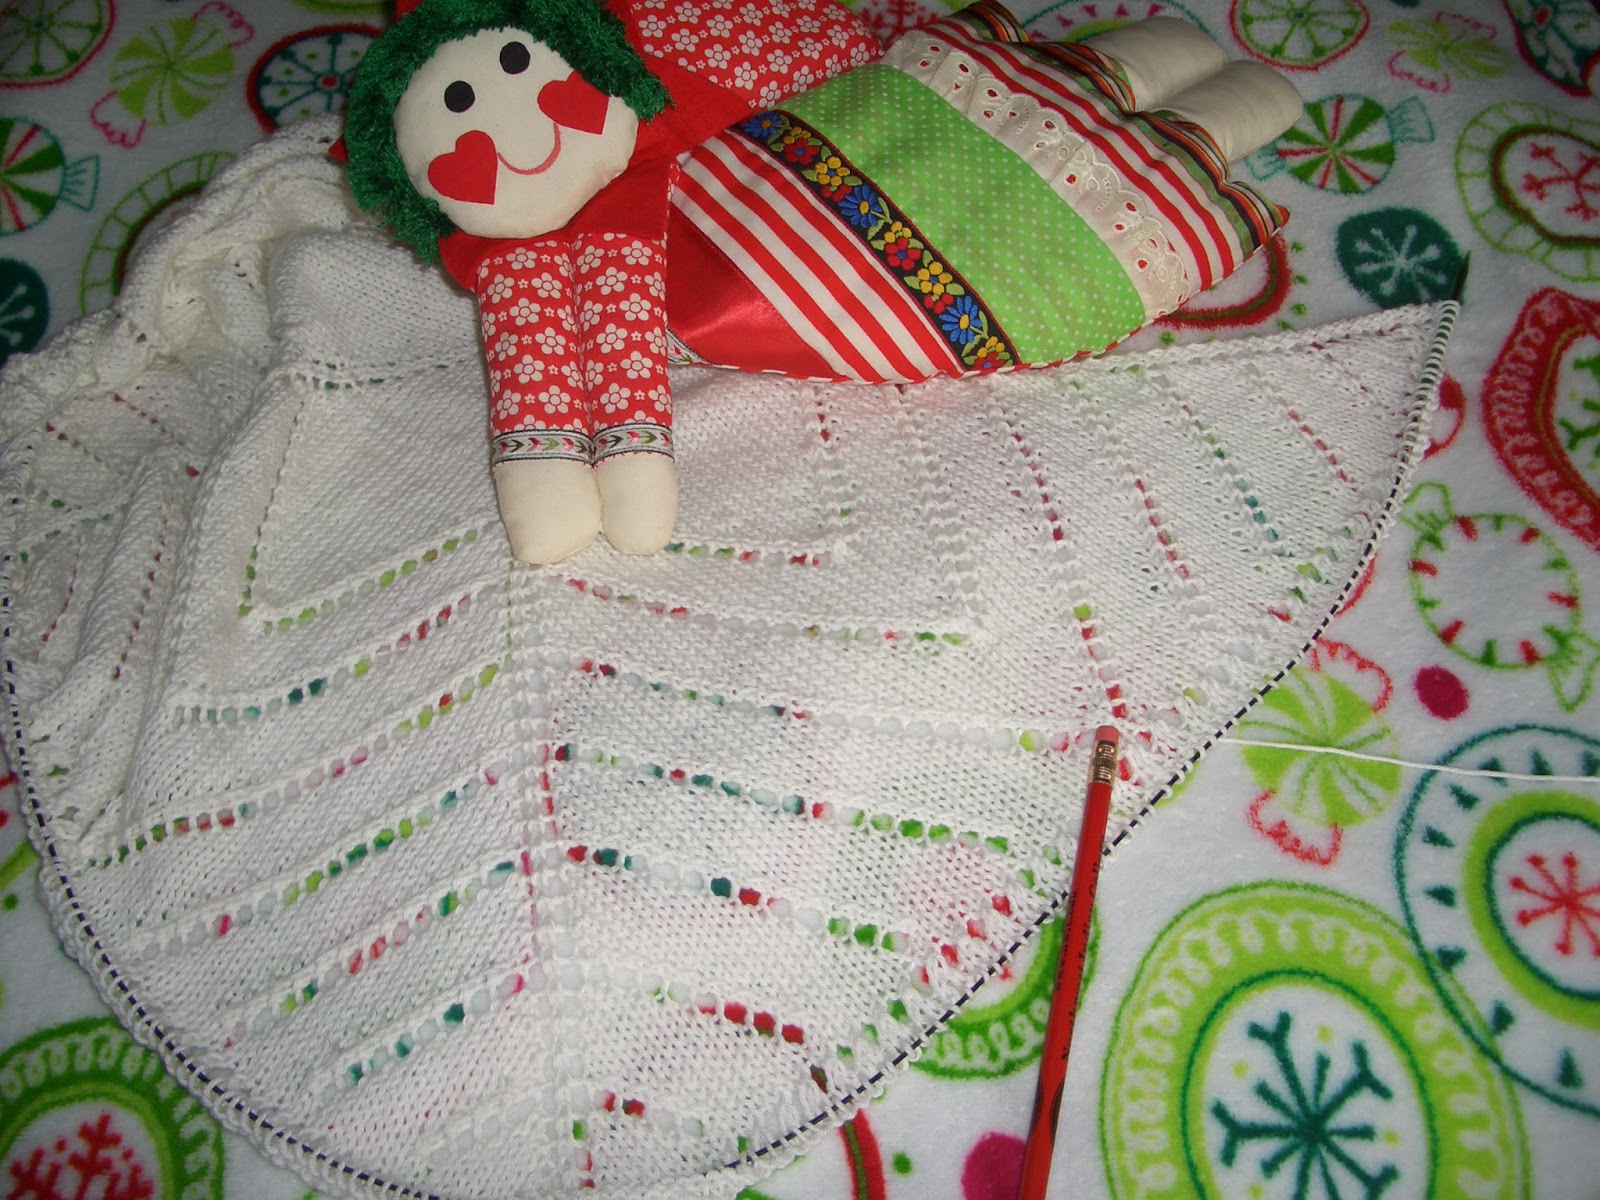
The red pen is pointing to the last of the chevron points
from the first pattern lace chart.  The row of holes
just above the black needle cord is a row of eyelets.

After the chevrons, the next lace chart begins (and ends) with eyelets.  These are a series of right and wrong side rows that create hole in the fabric, on purpose.  An eyelet series is a good way to learn to add stitches (yarn over) and take away stitches (knit 2 together, K2tog).  The adding and subtracting happen one right after the other and repeat all across the row.

See the holes?  They are shown from top to bottom of the
picture near to the stripe on the angel's robe.  This section
of lace is just beginning.  It will have another pattern of
holes that make flowers with petals and then a
final row of eyelets.

The "change to the next size needle' is not unusual in shawls and other lace knitting.  Bigger needles make bigger stitches so naturally the shawl will grow in size.  This shawl pattern will up-size needles 2 more times.  The last lace chart will be knitted with lots of holes that will appear to be random.  You'll have to wait and see, as will I.

Here's a view of the US6 (now empty) and the US7 (with shawl stitches on the cord between the two tips) and a pencil to give you an idea of relative size.  The last needle I'll be using will be bigger than the pencil.
Size US6 is rosewood; tips and cord are from Knit Picks.
The green plastic tip is from a set from WEBS.
Both work wonderfully.
Under the rosewood tips is the dark pink cord that
joins one tip to the other.  You might want to knit around
and around with these needles or you can just treat each end
as a straight needle and knit back and forth in rows, which
is what I am doing with the shawl.

Circular needles are long cords connecting needle tips.  If the needles are interchangeable, then the tips can be removed and replace by a needle tip of another size, or joined with a longer or shorter cord.  A good set of interchangeable needles represents the very essence of flexibility.

The white shawl is coming along quite nicely.  I'm enjoying it and so far am quite pleased with the outcome.  There are lots of stitches at this point, at least 125 per section.  I'm making three sections so, do the math, that's 375 stitches (and counting) on the long cord between needle tips.

Lots of stitches mean lots of knitting.  One of life's important lessons, I think, is the idea of "less is more."  In lace knitting, especially with shawls that 'grow,' this lesson must be put aside.  And especially in this shawl, when even the number of needles that are used is a total of 4, rather than the usual, maybe, 2.

Less is more might work for shampoo dosage, or pairs of sox, or cars in the garage, or cats in the house.  But this time the rule doesn't apply and the shawl is lovelier and lovelier for having broken all the 'rules.'


Wednesday, December 7, 2011

Round and round we go -- the Hat

Nobody wants a scratchy seam inside their nice hand-made knitted hat.  Solution?  Knit in the round.  Knitters use a combination of two techniques:  knitting with a set of double pointed needles (sticks) and knitting with circular needles.  Sounds like an oxymoron, doesn't it.  Circular needles have a knitting needle 'cap' on each end of a long flexible-but-not-floppy cord.  Often the needle 'tips' are interchangeable.  You can tuck away a UFO with stitches remaining on the cord, remove the needle 'tips' and attach to another cord, and the next project is ready for casting on.  Quite clever and they come in handy cases; the ultra special wooden ones have their own box.

Enuf, Becky -- on with the hat, please.

I'm using that yummy raspberry pink, think sherbet.  Per the instructions I'm adding other colors and yes, learning another new technique.  Here's the hat with the beginning pink ribbing and a row or two of cream contrast.
The green needle tips -- upper right corner -- are attached
to the cord running thru the stitches.  You can see part
of the card hiding beneath the ball of cream yarn.

I started this project with sticks -- a set of 5 double pointed needles (a point on each end).  You distribute all the stitches you need around 4 of the needles and use the 5th one to knit.  When it's full, you'll have another empty one and can turn the work counterclockwise to the next needle full of stitches.  
All the stitches -- 104 for this hat -- are distributed
evenly among 4 of the 5 sticks.  Can you see the small blue ring
at the top of the yarn tail?  That's where the 'round' begins.
You knit round and round but like riding the Merry-Go-Round
you gotta know where you got on and where to get off,
even if you are the one left riding the funny looking llama
when you wanted to ride the unicorn.  Thus the marker.
But how does the knitting work?  Here's a pic showing the four needles with the fifth one doing its work.  In the picture you can label the right hand stick in the foreground as number 5.


It's starting to look like a hat.  Well, use your imagination.
At least it's beginning to be round, no square.
Now what?
So after a bit, when you finish the ribbing, the stitches that keep the hat close to your head and ears, you usually switch to a needle that has a slightly larger diameter.  The sticks above are US5, the green needles on the cord are US7.  And you'll see I've added some cream rows.

This is the current condition of the hat.  At least it now looks
round and is gradually becoming more interesting.
More colors next time.

Sticks or circular?  Right up there with boxers or briefs, I reckon.  Totally a matter of personal preference plus what's available.  I could find the US5 sticks (all 5 of them, which was a miracle in itself!) and then no sticks in US7.  So I removed the US7 needle tips from an ignored UFO and attached them to a new cord.

It's not often we get options in knitting.  The people who began the art many moons ago and their followers thru the years have perfected most of the techniques and continue to enhance and add new ones.  I'm glad for these experts who have been enthralled so completely by the prospect of wrapping wool around sticks to create a garment worthy of a king.

This fine group has gifted us a legacy of creativity, enjoyment, and a fine time for friendly chatter or quiet contemplation.  Pick up some sticks and begin.